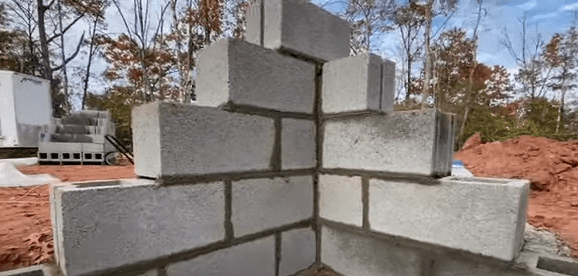
A Besser Block is a concrete block that is hollow, made of concrete, and shaped like a rectangle. Lines of Besser Blocks are meant to be stacked on top of one another to create walls. Each line is called a course. They are stuck together via mortar between blocks called joints and are usually reinforced with steel and/or concrete.

The standard size for a Besser block is 390mm long x 190mm high x 190mm wide which is able to stack with a 21mm gap and can be used in construction up to two storeys. The height, width and length vary from standard sizes, as well as the construction of the internal cavity; some may have steel bracings. Besser blocks are used on concrete foundations and on concrete slab construction.
Tools needed to lay Besser Blocks
There are a few basic tools you will need to lay Besser blocks in a neat fashion.
- Besser blocks
- Mortar
- A trowel
- A story pole
- A level
Guide to lay Besser Blocks
Laying concrete blocks is very similar to laying bricks. It can be done by following a few simple steps.

- Plan and draw in the area where you’ll be laying the blocks.
- Gather the tools and materials you’ll be needing.
- Make a mortar bed for the first course.
- Put in the first block and check its height.
- Prepare and set the second block.
- Repeat for the third block, tap them into place, and check if they are level.
- Reinforce and tie walls together when necessary.
Plan where you are laying the concrete blocks
After you know how large your blocks are and what your structure is going to look like, draw in the areas where you’ll be laying blocks down with chalk. This will serve as a guide for when you are actually working.
Make a Mortar bed for the first course
Spread a layer of cement mixture, with a thickness of around 15mm and just a bit wider than the width of your blocks. Make a thick “perimeter” of mortar on your chalk as if to line the edges of your blocks. It’s better to use a little bit more than what you think you need. Use your trowel to make neater lines.
Put in the first Besser block
Put the first block onto the mortar bed and make sure it is properly aligned. Use the story pole to check the height of the block. Gently push or tap the block into position until it matches the mark on the pole. If it accidentally gets too low, just pull it out, replace the mortar, and try again.
Set the second Besser block
The second block will require what is called an upright or a head joint. Mortar is placed on the surface where adjacent blocks meet in order to create a joint that sticks together with two blocks. Do this by spreading mortar on the ears of your block then smoothing and pressing it into the edges so that it doesn’t fall off. Set the second block. Take care to leave a little less than half an inch of joint space.
Repeat
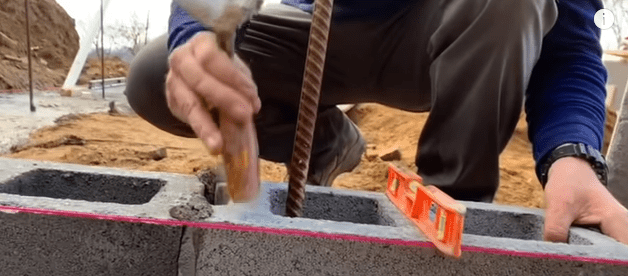
Perform the same steps for the third block, and then clean out the excess mortar around your blocks. Use your level to lightly press the blocks into their position and make sure that the blocks are flat and even. Check that the blocks are even on the sides as well.
Reinforce and Tie Besser Blocks
Steel reinforcement can be placed throughout the wall but is most necessary in retaining walls and sections where walls meet at perpendicular angles. Thin steel bars that act as reinforcement are embedded in mortar joints and through the cavities of the blocks.
Laying down Besser blocks is a very doable task, but it is important to do it right. If you are unclear about any of the steps above, feel free to check out videos online.

